Best practices for E3SM
This page summarizes the recommended best practices for archiving E3SM simulation output using zstash.
NERSC
For best performance on NERSC, you should login to one of the data transfer nodes (dtn<01..15>.nersc.gov). Also, because archiving large amount of data with zstash can take several days, it is recommended to invoke zstash within a UNIX screen session to which you can detach and re-attach without killing zstash. You can access zstash on the data transfer nodes by loading the E3SM unified environment:
$ ssh dtn01.nersc.gov
$ screen
$ bash
$ source /global/cfs/cdirs/e3sm/software/anaconda_envs/load_latest_e3sm_unified.sh
To detach from the screen session, use CTRL-A followed by D (for detach). You can then safely close your window. To re-attach to an existing session later:
$ ssh dtn01.nersc.gov
$ screen -r
Archive
Typically, you should consider archiving the entire directory structure
of a simulation. The first time, this is accomplished with zstash create.
For example:
$ ssh dtn01.nersc.gov
$ screen -r
$ cd /global/cscratch1/sd/golaz/E3SM/simulations/20180129.DECKv1b_piControl.ne30_oEC.edison
$ zstash create --hpss=2018/E3SM_simulations/20180129.DECKv1b_piControl.ne30_oEC.edison \
  --maxsize 128 . 2>&1 | tee zstash_create_20190226.log
The command above will archive the entire directory structure under /global/cscratch1/sd/golaz/E3SM/simulations/20180129.DECKv1b_piControl.ne30_oEC.edison. The archive files will be stored on HPSS under 2018/E3SM_simulations/20180129.DECKv1b_piControl.ne30_oEC.edison. Individual tar files in the zstash archive will have a maximum size of 128 GB. NERSC typically recommends file size between 100 and 500 GB for best performance.
If your model output has been reorganized using the CIME short-term archive utility, you can easily archive only a subset of the restart files to conserve space. For example, to archive restart files every 5 years only:
$ ssh dtn01.nersc.gov
$ screen -r
$ cd /global/cscratch1/sd/golaz/E3SM/simulations/20180129.DECKv1b_piControl.ne30_oEC.edison
$ zstash create --hpss=2018/E3SM_simulations/20180129.DECKv1b_piControl.ne30_oEC.edison \
  --exclude="archive/rest/???[!05]-*/" \
  --maxsize 128 . 2>&1 | tee zstash_create_20190226.log
Update
You can also add newly created files to an existing archive, or restart archiving after a
failure using the zstash update functionality:
$ ssh dtn01.nersc.gov
$ screen -r
$ cd /global/cscratch1/sd/golaz/E3SM/simulations/20180129.DECKv1b_piControl.ne30_oEC.edison
$ zstash update --hpss=2018/E3SM_simulations/20180129.DECKv1b_piControl.ne30_oEC.edison \
  --exclude="archive/rest/???[!05]-*/" 2>&1 | tee zstash_update_20190226.log
Check
After archiving or updating, it is highly recommended that you verify the integrity of the tar files. The safest way to do so is go to a new, empty directory and run:
$ zstash check --hpss=2018/E3SM_simulations/20180129.DECKv1b_piControl.ne30_oEC.edison
zstash check will download the tar archives to the local disk cache (under
the zstash/ subdirectory) and verify the md5 checksum of every file against the
checksum stored in the index database (index.db).
zstash check can also be run in the original location. But if tar files
are present in the local cache (zstash/ sub-directory), the check will only
be performed against the local disk copy, not the one on HPSS.
To save time, you can check in parallel by passing in a number of processes with the --workers
argument. Please see the full documentation for zstash check for more information.
If any corrupted file is found during the check, zstash will print a list of corrupted files in the archive, along with the tar archive they belong to.
There are currently two kinds of errors:
Checksum mismatch error: The file was extracted but the checksum doesn’t match the original one computed when the files was uploaded.
General extraction error: The file can’t be extracted due to another error.
To see what kind of error you have, search the output for your filename and you should be able to see what happened.
Regarding the first error, this seems to be caused by something on the HPSS end of this process. If you have the original model data, please try uploading it again.
With the second error, you might see something like:
INFO: Checking archive/ocn/hist/mpaso.hist.am.timeSeriesStatsMonthly.1855-10-01.nc
Traceback (most recent call last):
  File "build/bdist.linux-x86_64/egg/zstash/extract.py", line 145, in extractFiles
    s = fin.read(BLOCK_SIZE)
  File "/global/homes/z/zshaheen/anaconda2/envs/zstash_env_v0.2.0/lib/python2.7/tarfile.py", line 831, in read
    buf += self.fileobj.read(size - len(buf))
  File "/global/homes/z/zshaheen/anaconda2/envs/zstash_env_v0.2.0/lib/python2.7/tarfile.py", line 743, in read
    return self.readnormal(size)
  File "/global/homes/z/zshaheen/anaconda2/envs/zstash_env_v0.2.0/lib/python2.7/tarfile.py", line 758, in readnormal
    return self.__read(size)
  File "/global/homes/z/zshaheen/anaconda2/envs/zstash_env_v0.2.0/lib/python2.7/tarfile.py", line 750, in __read
    raise ReadError("unexpected end of data")
ReadError: unexpected end of data
This seems to be caused by the filesystem. Simply run zstash check again.
To save time, like zstash extract, you can check for specific files or tar archives:
$ zstash check --hpss=/path/to/hpss/archive "archive/ocn/hist/mpaso.hist.am.timeSeriesStatsMonthly.1892-04-01.nc"
$ zstash check --hpss=/path/to/hpss/archive "000012.tar"
Compy/Anvil
There is no long-term HPSS storage attached to Compy or Anvil. To archive a new simulation, we recommend the following:
Use zstash to create a local archive on disk.
Transfer files to NERSC HPSS using Globus.
While the instructions below are specific for Compy, adapting them for Anvil should be straightforward.
Archive
Starting with v0.4, zstash supports the creation of local archives only (using the
--hpss=none command line option). For example
$ screen
$ cd /compyfs/gola749/E3SM_simulations/20191216.alpha20.piControl.ne30_r05_oECv3_ICG.compy
$ mkdir zstash
$ zstash create --hpss=none  --maxsize 128 . 2>&1 | tee zstash/zstash_create_20200224.log
ctrl-a d # to disconnect from screen session
Check
Once archiving is complete, run zstash check locally to verify integrity of archive:
$ screen -r
$ cd /compyfs/gola749/E3SM_simulations/20191216.alpha20.piControl.ne30_r05_oECv3_ICG.compy
$ zstash check . 2>&1 | tee zstash/zstash_check_20200225.log
Transfer to NERSC HPSS
After the check completes successfully, transfer all zstash files to NERSC HPSS using Globus.
Login to Globus web interface at https://www.globus.org/ using your NERSC credentials.
On the leftmost pane, select ‘ENDPOINT’
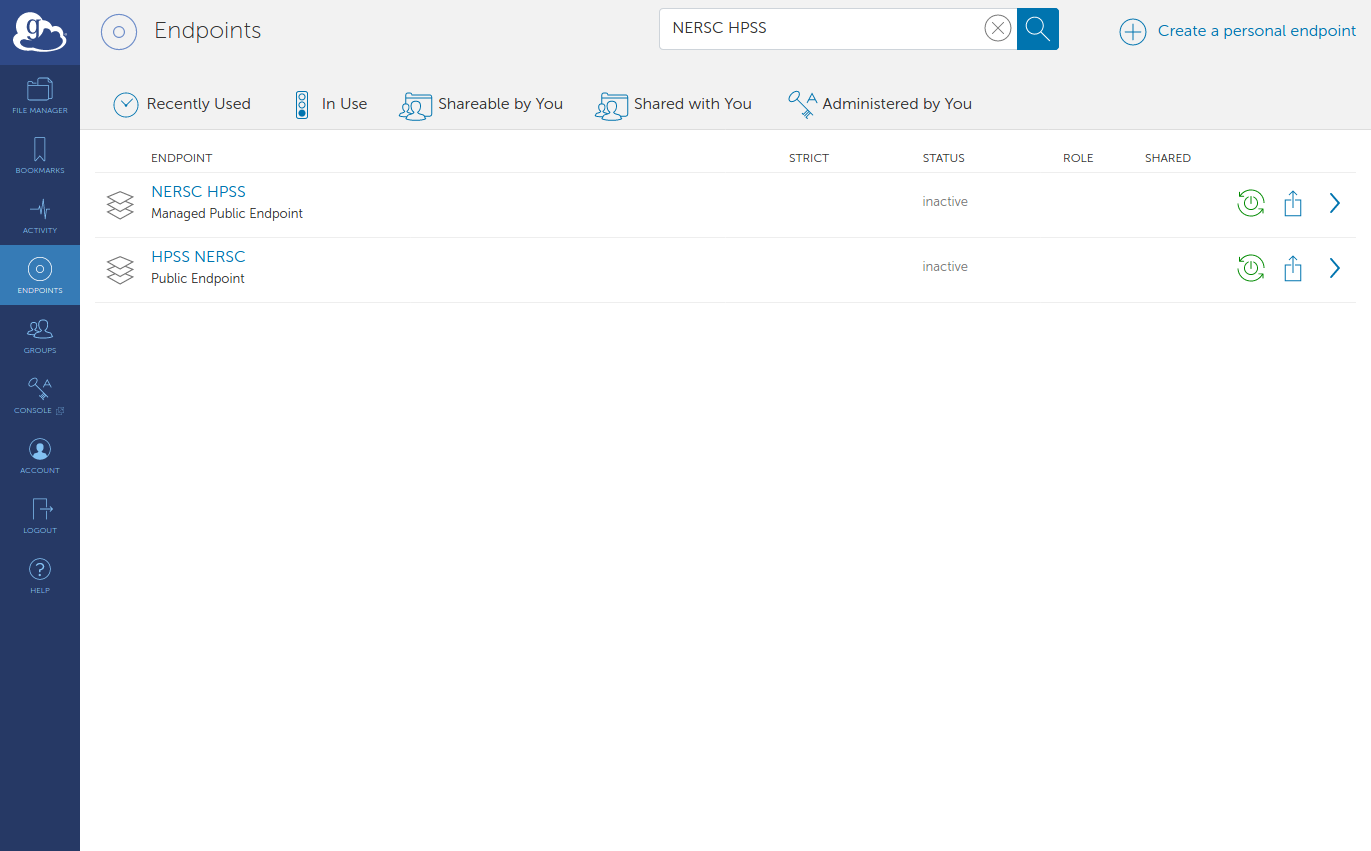
Search for ‘NERSC HPSS’. Click on Green power button to activate endpoint.

Back to the leftmost pane, select ‘ENDPOINT’
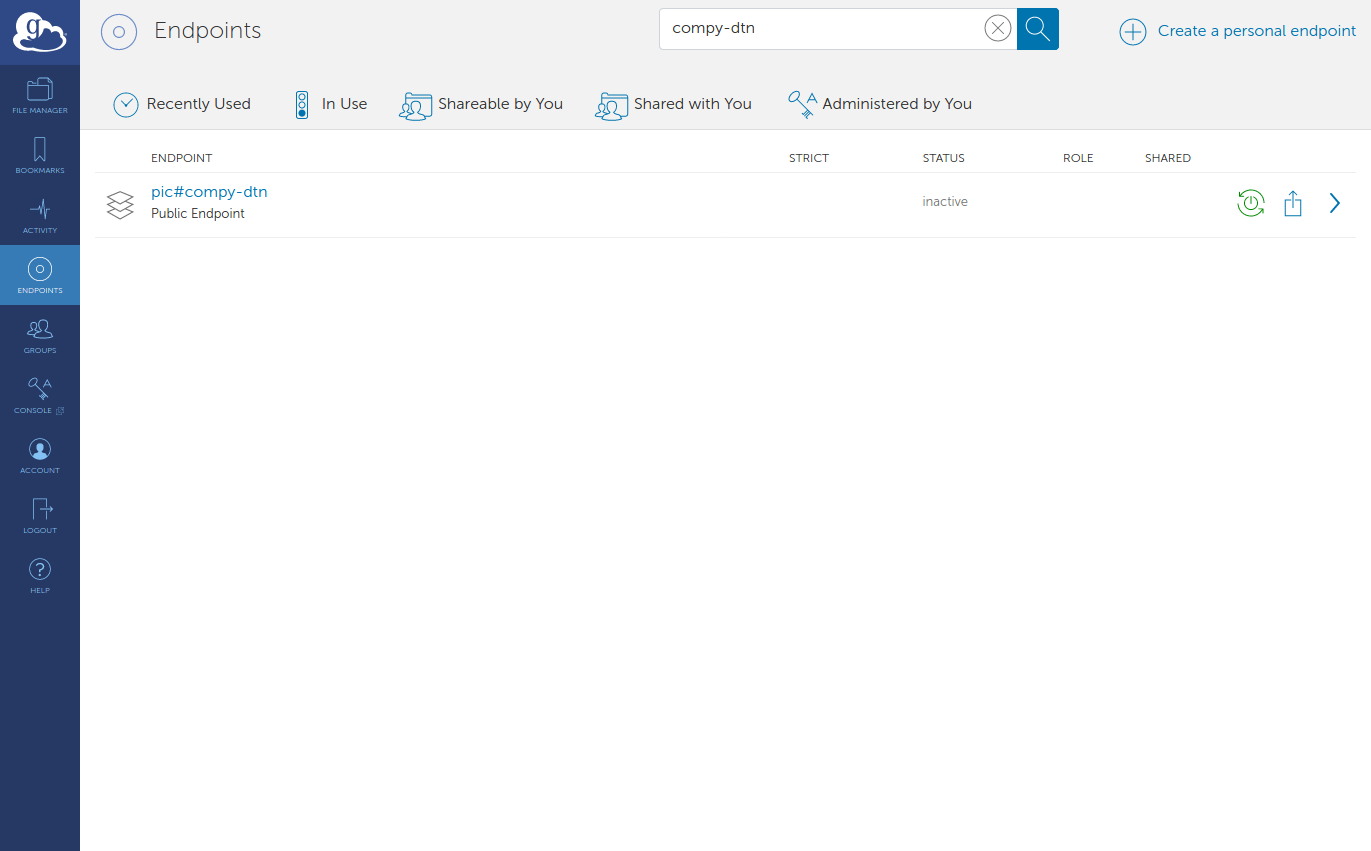
Search for ‘compy-dtn’. Click on Green power button to activate endpoint. Login using your compy credentials (username, PIN+RSA).

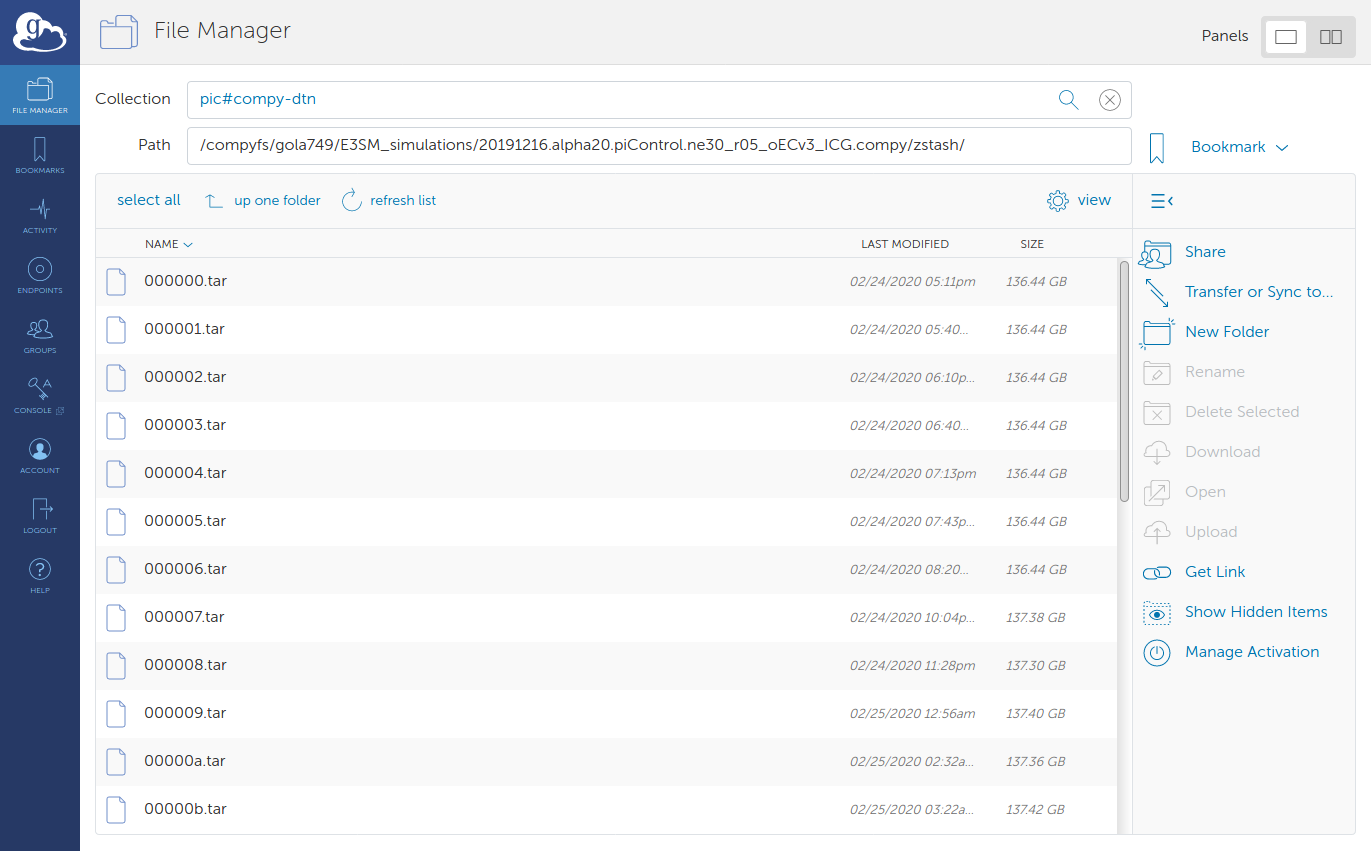
In the file manager, navigate to your local zstash directory.
Click on ‘Transfer or Sync…’

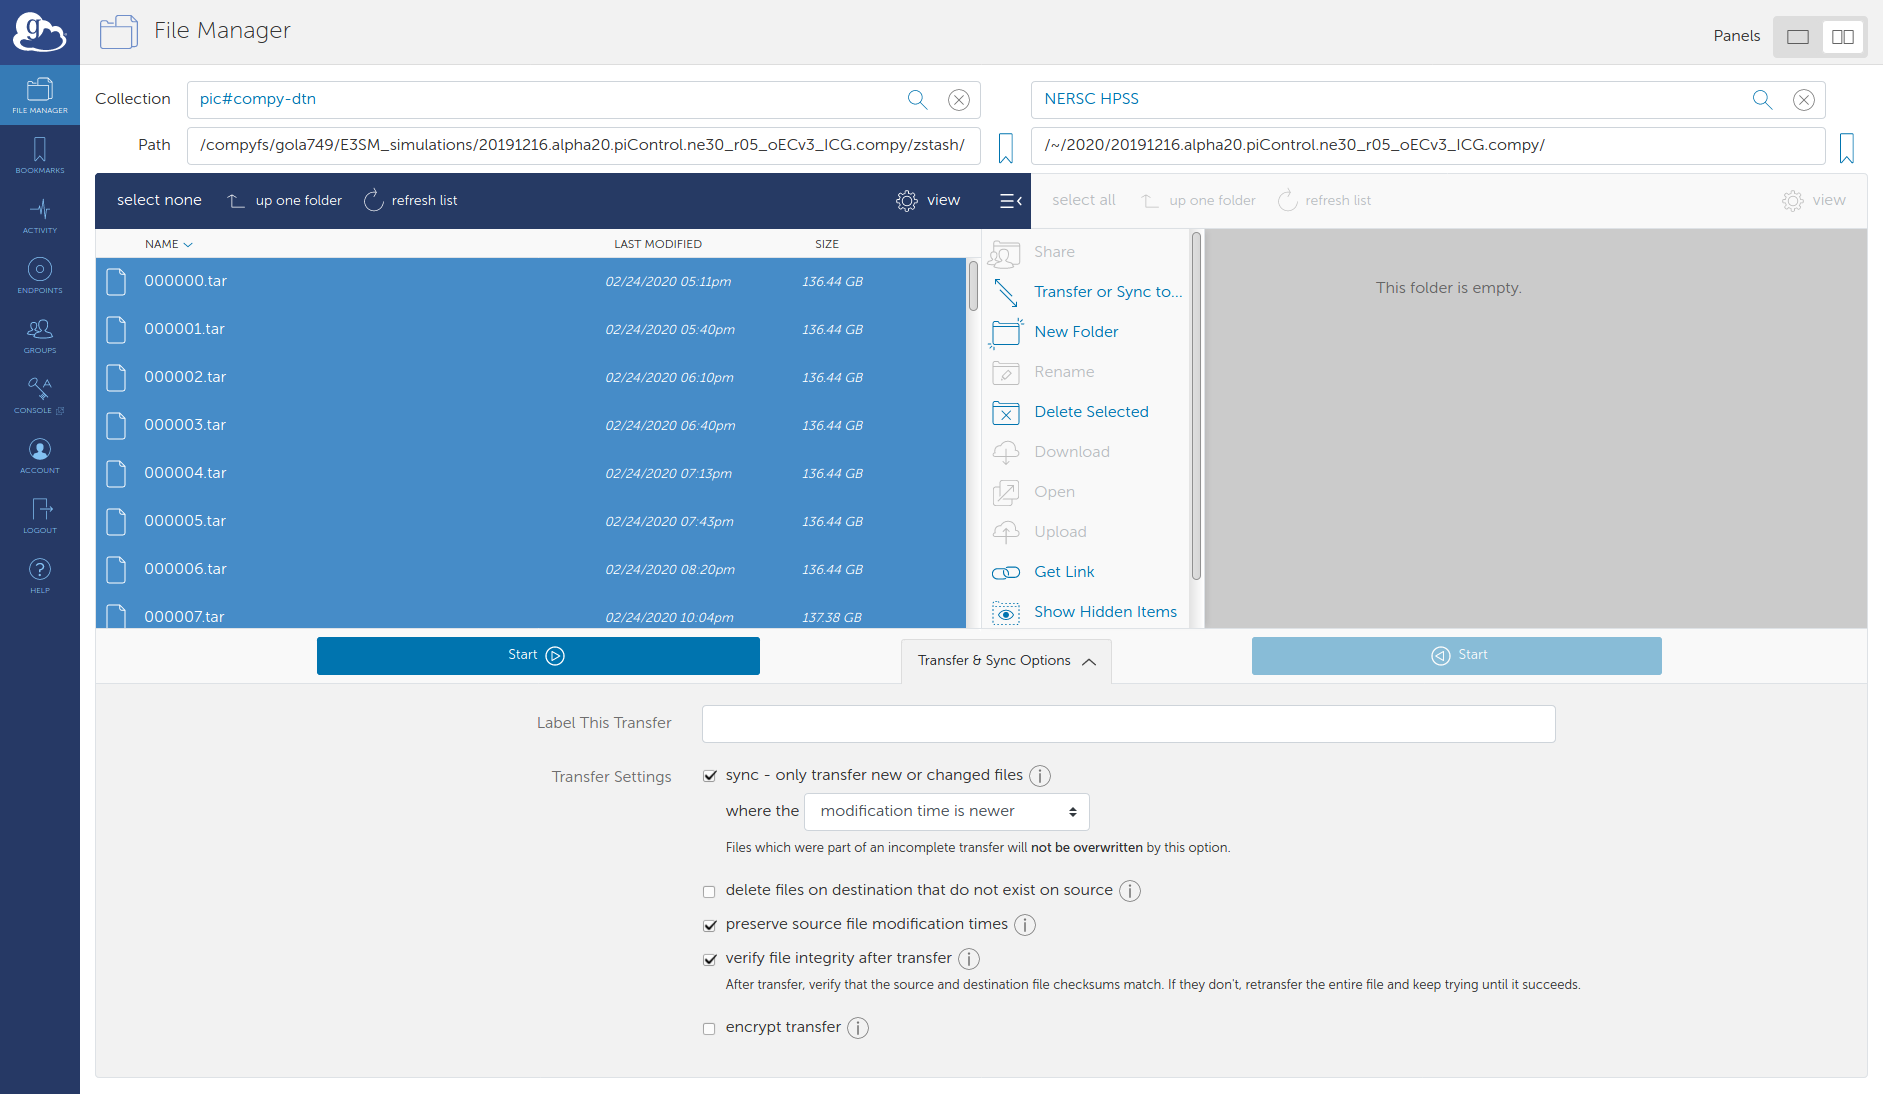
Configure sync
Select all source files in zstash folder.
Select destination endpoint and folder (the Globus web interface cannot create new directories, so you will have to create the destination directory on NERSC HPSS is if doesn’t already exist).
Suggested options for sync
transfer files where the modification time is newer
preserve source file modification time
Click ‘Start ->’.
